|
Description |
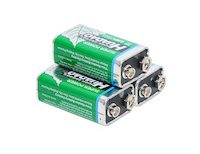
The 9V battery is a compact, rectangular-shaped battery commonly used in various electronic devices and household applications. Known for its reliability and long shelf life, the 9V battery provides a steady voltage output, making it ideal for devices that require a stable power source. It is widely used in smoke detectors, multimeters, transistor radios, and other portable electronic devices.
Key Features:
- Type: 9V battery
- Voltage: 9 volts
- Capacity: Varies by manufacturer (typically between 500mAh to 1200mAh)
- Shelf Life: Up to 5 years
- Size: Standard 9V (rectangular with snap connectors)
- Reliable Performance: Consistent and stable power output
- Leak-resistant: Designed to prevent leakage and protect devices
Technical Specifications:
- Voltage: 9V
- Capacity: Typically between 500mAh to 1200mAh
- Dimensions: 48.5mm x 26.5mm x 17.5mm
- Weight: Approximately 45g
- Terminal Type: Snap connector
- Chemistry: Available in Alkaline, Lithium, or Rechargeable NiMH
- Operating Temperature Range: -20°C to +54°C
Applications:
- Smoke Detectors: Reliable power source for safety devices.
- Multimeters: Provides consistent voltage for accurate measurements.
- Transistor Radios: Powers portable radios for extended periods.
- Portable Electronic Devices: Suitable for various battery-operated devices.
- Toys: Used in electronic toys and gadgets.
Usage:
- Installation: Insert the 9V battery into the device, ensuring correct polarity alignment.
- Replacement: Replace the battery when the device indicates low power or performance drops.
- Storage: Store batteries in a cool, dry place to maximize shelf life.
Caution:
- Proper Disposal: Follow local regulations for battery disposal.
- Avoid Short-circuiting: Do not connect terminals directly, as it may cause overheating or leakage.
- Do Not Recharge: Non-rechargeable 9V batteries should not be recharged.
Datasheet:
For detailed technical specifications, refer to the 9V Battery Datasheet.
|
A set of male-female jumper wires includes multiple wires, each with a male connector on one end and a female connector on the other. These wires are commonly used in electronic prototyping and development to establish connections between components, breadboards, and circuit boards. The set typically comes in a variety of lengths and colors, making it versatile and easy to manage for various project needs.
Key Features:
- Connectors: Male connector on one end and female connector on the other
- Wire Type: Flexible, insulated wire for easy routing and manipulation
- Length Options: Set often includes wires of various lengths to suit different applications
- Color-Coded: Available in multiple colors for easy identification and organization
- Durability: High-quality materials for reliable and repeated use
- Compatibility: Fits standard 2.54mm (0.1 inch) pitch headers and connectors
Technical Specifications:
- Connector Type: Male-to-female
- Wire Gauge: Typically 28 AWG
- Insulation Material: PVC or similar flexible plastic
- Pitch: 2.54mm (0.1 inch)
- Length Options: Common lengths in the set may include 10cm, 20cm, 30cm, etc.
- Operating Temperature: Typically -40°C to +80°C
- Current Rating: Usually up to 1A
Applications:
- Prototyping: Ideal for creating and modifying circuits on breadboards and development boards.
- Educational Projects: Used for teaching and learning electronics and programming.
- DIY Electronics: Perfect for hobbyists working on various electronics projects and experiments.
- Temporary Connections: Useful for making temporary connections during the development and testing phases.
- Interfacing Modules: Facilitates connections between male pin headers and female sockets on different electronic modules and components.
|
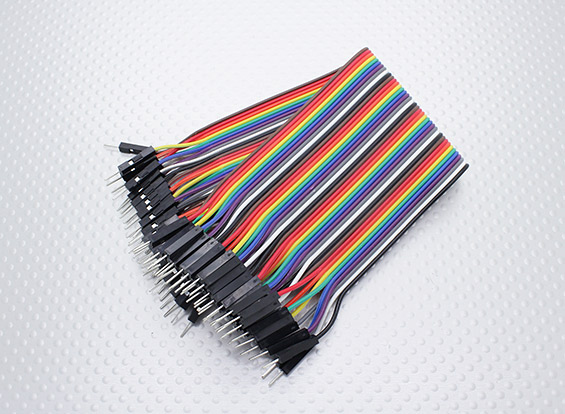
The Male-Male Jumper Wires (Set) is an essential component for breadboarding and prototyping in electronics projects. These wires are used to establish quick and reliable connections between various points in a circuit, such as between the pins of a microcontroller, sensors, modules, and other components. The set typically includes a variety of lengths and colors to help with organizing and identifying connections.
Key Features:
- Easy and quick connections for breadboards and other prototyping environments
- Variety of lengths and colors for flexibility and organization
- Durable and reusable
- Compatible with standard 0.1” (2.54mm) pitch headers
- Ideal for Arduino, Raspberry Pi, and other microcontroller projects
Technical Specifications:
- Connector Type: Male to Male
- Pin Spacing: 0.1” (2.54mm)
- Wire Lengths: Varies (typically 10cm, 20cm, and 30cm)
- Wire Gauge: 24 AWG
- Insulation Material: PVC
- Conductor Material: Copper or copper-clad aluminum
- Colors: Multiple (e.g., red, blue, green, yellow, black, white)
- Quantity: Typically 40 wires per set (may vary)
Applications:
- Breadboarding and prototyping
- Microcontroller and development board projects
- Interfacing sensors and modules
- Educational and DIY electronics projects
- Connecting components in a temporary setup
Usage:
- Connecting Components:
- Use the jumper wires to connect the pins of different components on a breadboard or between header pins on development boards.
- Ensure firm and secure connections by inserting the male ends into the breadboard or header sockets.
- Organizing Circuits:
- Use different colors to identify various connections and signals, making the circuit easier to debug and understand.
- Select appropriate wire lengths to minimize clutter and ensure neat and organized prototyping.
- Reusability:
- Jumper wires can be reused in multiple projects, making them a cost-effective solution for prototyping.
Caution:
- Handle with care to avoid damaging the wire insulation or connectors.
- Ensure correct connections to avoid short circuits or incorrect wiring.
- Store in a dry and cool place to maintain the integrity of the connectors and insulation.
Datasheet:
Refer to the specific manufacturer’s datasheet or product details for more information if available.
|
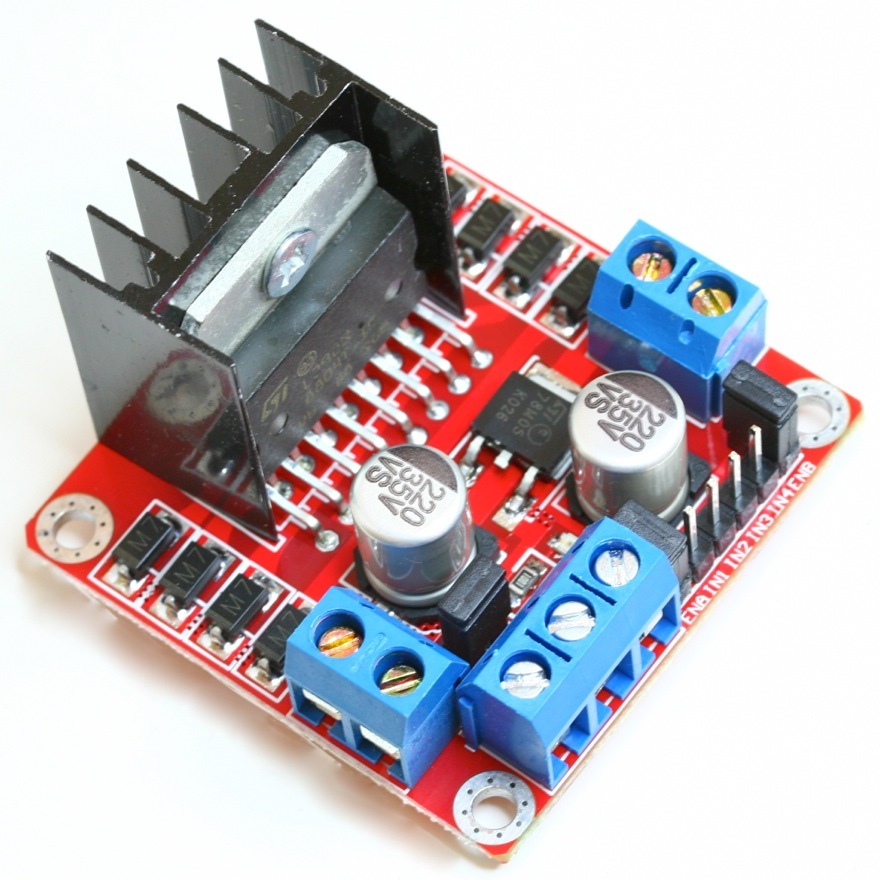
The L298N Dual H Bridge DC Stepper Motor Driver is a robust and versatile module used for controlling DC and stepper motors in various electronic projects. This driver module can control the speed and direction of two DC motors or a single stepper motor, making it ideal for robotics, automation, and other motor control applications. It features an onboard 5V regulator and can handle high currents, ensuring reliable operation in demanding environments.
Key Features:
- Motor Control: Dual H Bridge for controlling two DC motors or one stepper motor
- Voltage Range: Supports motor voltage from 5V to 35V
- Current Handling: Each bridge can handle up to 2A
- Onboard 5V Regulator: Provides 5V output for powering external circuits
- Control Pins: Enable and direction control for each motor
- Protection: Built-in thermal shutdown and overcurrent protection
- Compact Design: Easy to integrate into various projects
Technical Specifications:
- Motor Voltage: 5V to 35V
- Current Handling: 2A per bridge (peak 3A)
- Logic Voltage: 5V
- Control Inputs: 4 (IN1, IN2, IN3, IN4) for direction control
- Enable Pins: 2 (EN1, EN2) for enabling the motors
- Output Voltage: 5V (when using onboard regulator)
- Dimensions: 43mm x 43mm x 27mm
Applications:
- Robotics: Control of DC motors and stepper motors in robots.
- Automation: Use in automated systems for precise motor control.
- DIY Projects: Ideal for hobbyists and makers building motorized projects.
- Industrial Control: Suitable for controlling motors in industrial equipment.
- Educational Kits: Commonly used in learning modules for motor control.
Usage:
- Power Supply: Connect the motor power supply to the VCC and GND terminals, ensuring it is within the specified voltage range.
- Motor Connection: Connect the DC motors or stepper motor to the output terminals (OUT1, OUT2, OUT3, OUT4).
- Control Inputs: Use the control pins (IN1, IN2, IN3, IN4) to set the direction of the motors. The enable pins (EN1, EN2) can be used to enable or disable the motors.
- Logic Power: If using the onboard 5V regulator, connect the 5V and GND pins to your microcontroller or control circuit.
- Programming: Write code to control the motor speed and direction using PWM signals and logic inputs.
Caution:
- Heat Dissipation: The module can get hot during operation. Use a heat sink or cooling fan if necessary.
- Voltage and Current Limits: Do not exceed the specified voltage and current ratings to prevent damage.
Datasheet:
For detailed technical specifications, refer to the L298N Dual H Bridge DC Stepper Motor Driver Datasheet.
|
|
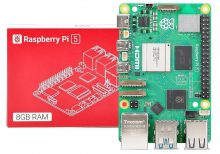
The Raspberry Pi 5 (8GB RAM) is the latest iteration in the Raspberry Pi series, featuring significant performance improvements and expanded memory to handle more demanding applications. With a powerful quad-core processor, enhanced GPU, and versatile connectivity options, this compact single-board computer is ideal for a wide range of projects and applications.
Key Features:
- 8GB RAM: Ample memory for complex tasks and multitasking
- Quad-Core Processor: Enhanced processing power for improved performance
- Enhanced GPU: Supports 4K video output and better graphics performance
- Multiple Connectivity Options: USB 3.0 ports, Gigabit Ethernet, Bluetooth 5.0, and Wi-Fi
- Expandable Storage: MicroSD card slot and USB boot capability
- GPIO Pins: 40-pin GPIO header for hardware projects
Technical Specifications:
- Processor: Quad-core ARM Cortex-A72, 1.8GHz
- Memory: 8GB LPDDR4 RAM
- Graphics: Broadcom VideoCore VI, supports dual 4K displays
- Storage: MicroSD card slot, USB boot support
- Connectivity:
- 2 x USB 3.0 ports
- 2 x USB 2.0 ports
- Gigabit Ethernet
- Dual-band 2.4/5.0 GHz IEEE 802.11ac wireless
- Bluetooth 5.0
- Video Output: 2 x micro HDMI ports (supports up to 4K resolution)
- Audio Output: 3.5mm audio jack, HDMI
- Power Supply: 5V/3A USB-C power input
- GPIO: 40-pin GPIO header
- Operating System: Compatible with Raspberry Pi OS and various Linux distributions
Applications:
- Home automation
- Media centers and streaming devices
- IoT projects
- Educational tools for learning programming and electronics
- Personal computing and office tasks
- Robotics and AI projects
Usage:
- Insert a pre-loaded microSD card with the operating system into the microSD card slot.
- Connect peripherals such as a keyboard, mouse, and monitor.
- Plug in the power supply to the USB-C power input.
- Set up and configure your Raspberry Pi 5 as needed.
Caution:
- Use a high-quality power supply to ensure stable operation.
- Handle the board with care to avoid static damage to components.
Datasheet:
For more detailed technical information, refer to the Raspberry Pi 5 (8GB RAM) Datasheet.
|
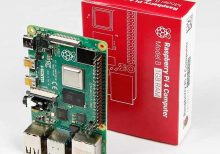
The Raspberry Pi 4 Model B is a versatile and powerful single-board computer, designed for a wide range of applications from DIY projects to professional development. The 1GB RAM version offers sufficient memory for basic tasks and lightweight applications, making it an ideal choice for various computing needs.
Key Features:
- Powerful Processor: Quad-core ARM Cortex-A72 CPU running at 1.5 GHz
- Memory: 1GB LPDDR4 RAM
- Connectivity: Gigabit Ethernet, 2.4GHz and 5GHz Wi-Fi, Bluetooth 5.0
- USB Ports: 2x USB 3.0, 2x USB 2.0
- Video Output: 2x Micro HDMI ports (up to 4K resolution)
- Storage: MicroSD card slot
- GPIO: 40-pin GPIO header for expansion and interfacing
Technical Specifications:
- Processor: Quad-core ARM Cortex-A72, 1.5 GHz
- Memory: 1GB LPDDR4
- Networking: Gigabit Ethernet, Wi-Fi 802.11ac, Bluetooth 5.0
- USB Ports: 2x USB 3.0, 2x USB 2.0
- Video Output: 2x Micro HDMI (supports up to 4K resolution)
- Audio: 3.5mm audio jack
- Storage: MicroSD card slot
- GPIO: 40-pin GPIO header
- Power Supply: 5V DC via USB-C
- Dimensions: 85.6 mm x 56.5 mm
Applications:
- Personal Computers
- Media Centers
- Educational Tools
- Home Automation
- IoT Projects
Usage:
- Connect the Raspberry Pi 4 to a monitor via Micro HDMI cables.
- Insert a microSD card with the desired operating system.
- Connect a USB keyboard and mouse.
- Power the board using a 5V USB-C power supply.
- Follow on-screen instructions to set up the operating system.
Caution:
- Use a compatible 5V USB-C power supply to avoid power issues.
- Handle the board with care to avoid damage to connectors and components.
Datasheet:
For more detailed technical information, refer to the Raspberry Pi 4 Model B Datasheet.
|
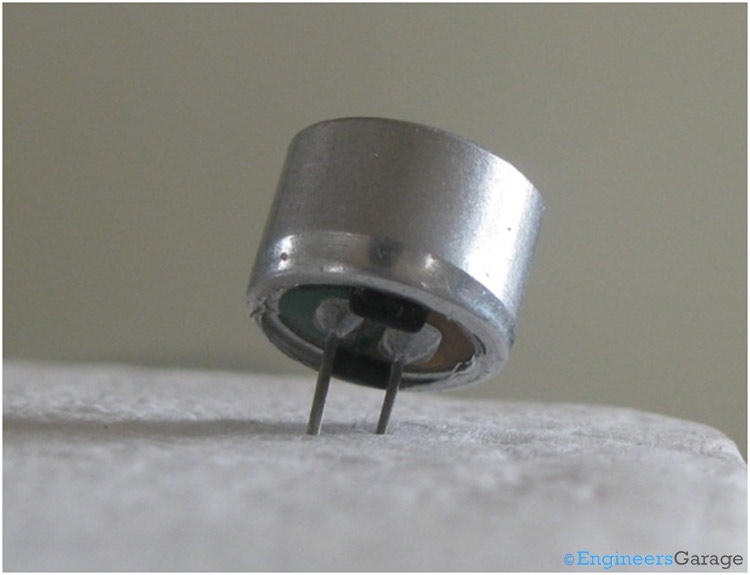
The Condenser Mic 4.5×2.2mm is a small-sized, high-sensitivity electret microphone. It is designed for a wide range of audio applications, including voice recording, telecommunication devices, and various consumer electronics. Its compact size and high sensitivity make it ideal for embedding in small devices.
Key Features:
- High sensitivity and low noise
- Small and compact size
- Wide frequency response
- Low power consumption
- Omnidirectional pickup pattern
- Easy to integrate into electronic circuits
Technical Specifications:
- Type: Electret condenser microphone
- Dimensions: 4.5mm (diameter) x 2.2mm (height)
- Sensitivity: -42dB ±3dB (0dB = 1V/Pa at 1kHz)
- Frequency Response: 20Hz to 16kHz
- Impedance: ≤ 2.2kΩ
- Operating Voltage: 1.5V to 10V DC
- Current Consumption: ≤ 0.5mA
- Signal-to-Noise Ratio: ≥ 60dB
- Directivity: Omnidirectional
- Operating Temperature Range: -20°C to +70°C
Applications:
- Voice recording devices
- Telecommunication equipment
- Hearing aids
- Portable audio recorders
- Consumer electronics
- Smart home devices
- Speech recognition systems
Usage:
- Connection:
- Connect the microphone’s output pin to the input of an amplifier or preamp circuit.
- Connect the power supply (1.5V to 10V DC) to the microphone.
- Ensure the ground connection is properly made to avoid noise interference.
- Integration:
- Place the microphone in a suitable location to capture sound effectively.
- Embed the microphone in devices ensuring the sound entry is not obstructed.
- Circuit Design:
- Use appropriate capacitors and resistors as per the microphone’s requirements.
- Design the circuit to provide a stable power supply and proper impedance matching.
Caution:
- Handle the microphone with care to avoid physical damage.
- Protect the microphone from exposure to moisture and extreme temperatures.
- Avoid applying excessive voltage to prevent damage to the microphone.
Datasheet:
For detailed technical specifications, refer to the Condenser Microphone Datasheet.
|
