Subtotal: ₦3,500.00
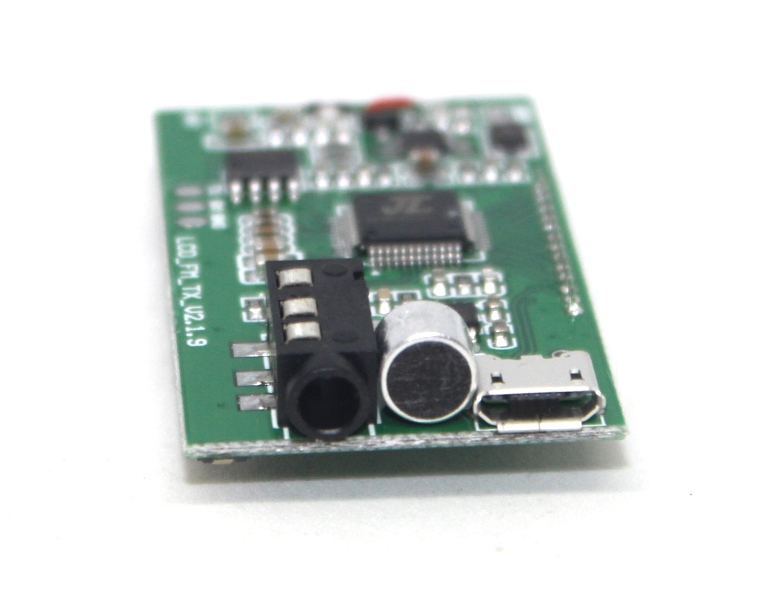
Multifunction FM stereo transmitter module
₦12,400.00
Description:
The Multifunction FM Stereo Transmitter Module is designed to transmit audio signals over FM radio frequencies. It offers multiple functionalities including adjustable frequency, stereo audio input, and various operating modes. This module is suitable for applications requiring FM audio broadcasting or transmission.
Key Features:
- FM Stereo Transmission: Transmits audio signals in stereo mode
- Adjustable Frequency: Allows tuning to different FM frequencies for optimal transmission
- Audio Input: Compatible with standard audio sources for flexible usage
- Multiple Operating Modes: Includes various modes for different transmission needs
- Compact Size: Easy to integrate into various projects and devices
Technical Specifications:
- Operating Frequency: 76 MHz to 108 MHz (FM Band)
- Power Supply: Typically 5V DC
- Audio Input: 3.5mm jack or RCA connectors
- Modulation: FM Stereo
- Output Power: Varies depending on module specifications
- Dimensions: Compact board suitable for various applications
Applications:
- DIY Radio Projects: Create custom FM radio stations or transmitters
- Audio Broadcasting: Broadcast audio signals over FM radio frequencies
- Wireless Audio Transmission: Send audio from a source to an FM receiver
- Educational Projects: Useful for learning and experimenting with FM transmission technology
Datasheet:
For detailed technical information and specifications, please refer to the Multifunction FM Stereo Transmitter Module Datasheet.
In stock
1. Product Introduction:
1>. Output Power:100mW
2>. Audio Frequency Response Range:50Hz-18KHz
3>. Transmission Frequency:87.0MHz-108.0MHz (campus broadcast power off);76.0MHz-108.0MHz (campus broadcast power on)
4>. Frequency Adjustment Stepping:0.1MHz/times (short press the key);1.0MHz/times (long press the key)
5>. Modulation Mode:standard FM
6>. Sound Track:LINE/USB channel (stereo);MIC channel (single channel) 7>. Equivalent Noise:>=30dB
8>. Power Supply Voltage:DC 3.0V-5.0V 9>. Operating Current:35mA
10>. Adaptive Antenna:75cm bar antenna
2. Application:
1>. FM Wireless Frequency
2>. USB PC Audio Broadcast
3>. Wireless Microphone
4>. Maternal And Infants Custody
3. Instruction:
1>. Power supply
The corresponding port of the module “-“, “+” respectively connects the power (battery) negative pole and the positive pole. The power supply is recommended for battery or other stabilized power supply.Do not use an unfiltered power supply (such as a mobile phone charger and other low-quality switching power supply), otherwise the interference of the power supply will affect the normal work of the module.The normal working voltage of this module is 3.0-5.0V, and the power supply voltage should not exceed this range.
2>. Buttons
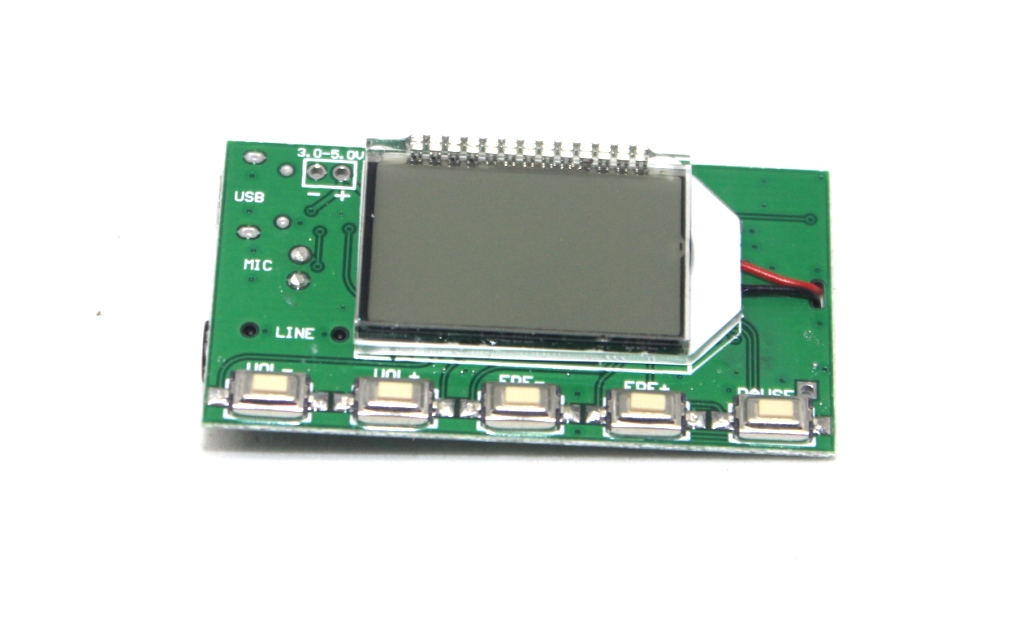
Volume +/- : short press volume +/- 1, long press continuous +/-.
Frequency +/- : short press frequency +/ -0.1mhz, long according to continuous +/ -1mhz.
Mute: short press to switch mute/non-mute.
3>. Antenna
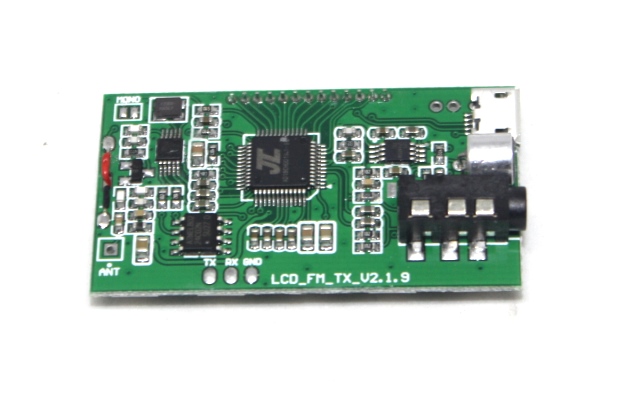
The ANT port is used to connect the FM antenna. In order to better transmit the FM signal, it is recommended to extend the antenna with a length of 75cm. And the antenna is near as far as possible without obstruction.
4>. USB audio connection
If you want to start the USB audio broadcast function of this module, you need to connect the USB cable to the computer. USB port is compatible with common cell phone, so you can use the USB cable to connect the module and computer. Because computer USB comes with 5V output, USB connection can be used to supply power to the module directly. After connecting to the computer USB, the module will automatically enter the PC audio broadcast mode, the LCD screen will display the PC, the computer terminal will install the driver automatically, and the module will be named “CD002” sound card device. Enable this “CD002” audio device in the computer voice Settings. Computer system audio can be transmitted through this module by FM. When the radio frequency is adjusted to the frequency of this module, the audio of the computer terminal system will be heard.
5>. LINE audio connection
If you need this module LINE (line in) channel as a source of sound emission, please insert one end of the audio LINE into 3.5 mm audio jack of the module , insert the other end into your audio device (such as mobile phone headset hole), the module automatically switch to the launch of the audio source LINE channel as FM. The nearby FM radio can be heard from the mobile phone as long as it is tuned to the same frequency as the module.
6>. FM wireless microphone
If you need MIC of this module to launch, pull out LINE and USB cable (LINE and USB are not connected). The module is automatically transferred to the MIC channel as the transmitting audio source of FM. This module is equipped with a high sensitivity electret microphone, which can be used in wireless microphone, mother-baby monitoring and so on. Note to adjust the volume of this module to achieve the optimum sound pickup effect when used.
7>. Serial port control (please ignore this part without serial port control)
The module reserved TTL level serial port control interface.When TTL serial port communicates with this module, it needs to connect the module’s UART_RX, UART_TX and GND.You can use the external MCU or the computer serial port to send instructions control module related functions.
Note : The computer serial port is not TTL level. When connecting to the computer communication, it is necessary to connect the RS323 level to the TTL power leveling device or to use the USB TTL level serial port module to communicate with the module. Serial command control module requires certain computer expertise, if you don’t understand, please don’t try.
4. User-defined Settings:
1>. Setting of backlight LED mode
When the power is off, press the “FRE-” and “FRE+” button at the same time to start up. B1 indicates always bright. B0 indicates that the backlight is closed for 20 seconds, and the reset setting takes effect. (the factory defaults to 20 seconds of backlight delay).
2>. Start/close the campus radio frequency band
When the power is off, press VOL+,VOL- key, and power on.LCD display C1, which means to start the campus broadcast.C0 means closing the campus radio frequency band.Set to take effect after restart. (the factory defaults to closing the campus radio frequency band).
3>. Settings of stereo/mono transmission mode
The back of the module has two solder joints M,G. Short connecting is the monophonic launch. Disconnecting these two points is the stereo system launch. (the
factory defaults to stereo system launch).
Note: the stereo system must satisfy the input to the module’s audio source is stereo and the radio is also stereo to achieve the stereo effect. When using a single speaker (monophonic) radio or input to the module’s audio signal as mono, there is no stereo.
5. Using attention:
1>. The power supply voltage is strictly prohibited to exceed the power supply voltage range of this module.
2>. Do not touch the back part of the module when working, so as not to affect the normal work of this module or cause the short-circuit burn module.

